Friday, May 17, 2013

Tilting floor trap and perch

Here's the axle, the rod in the corner.
Here's the sides and face plate. Also the tipping floor and funneling chute.
Counter-balance arm and slot in side wall. Notice the floor and wall arc matches the arc of the roof

.
The chute that will lead to the down tube and catch cage.
The tipping floor wall hole will close off as soon as it tips. There's the counter balance bolt, nut, and washer.
  Counter balance arm and what seems to be the right amount of weight, such that the floor tips with 4 qtrs.

Trapping slowed

Now that the starlings are breeding and food is abundant, trapping has completely stopped. Final tally was just shy of 100.

All the bags have 4 in them (this one only has two), but I sold 10 earlier in the winter. Most of these were caught in the Nest Box, 2 in my tilting floor design, and ZERO in the V trap as it was designed to function.

But I did make the V work for me. I added two one way gates along the floor near the food dispenser. During cold weeks, I would chum the entrance with cat food and prop it open, to try and establish a pattern of food. I would refill it each morning for a day or so, then leave. I would finally chum it at the same time of day and then wait in my car and watch. Usually one or two scouts would test the waters, then quickly many more would show up. I would wait until 5 or more were in the trap, then I would jump out with a lot of noise and arm waving. The starlings would all fly up and away from me and the entrances. I would then drop the one way doors and voila! , the V trap worked!

I would give them a couple of days to get used to hiding in the black box, then I would get them in the box and move them into the killing jar and gas them. Then put four in a vacuum bag, seal it, date it, and into the freezer.

My dad has an over abundance of English house sparrows coming to his feeders, so improving on my V trap work-around,  I designed a trap that uses a mouse trap to close the one way door. I then made a set up so I can use a cord to trigger it remotely.


I made it wedge shaped so that the birds will move to the larger end away from the entrance. We'll see how it works. Downside, someone has to be there to trigger it. Upside, catch only what you want.


Sunday, November 18, 2012

Rotating perch

Here is a perch my sponsor recommended to me. It's sized for a smaller bird, sharp-shin or merlin maybe.


It swivels around on a base plate with a lazy susan set up between. The hawk is tethered to the eye bolt on the side and when the bird flies off, or bates, the perch rotates with her. This keeps the leash from being pulled between the tail feathers and possibly causing damage. I imagine the force of the bate will also be turned in to the energy needed to turn the plates and soften the blow. I hope to start with a goshawk,
 (another topic for another time,) and therefore needed to increase the scale of the design.

I decided to make the perch 12 inches high as many commercially made bow perches intended for larger hawks were around this height. That meant the diameter would be 24 inches. I bought some oak veneered 3/4" plywood for appearance, strength, and price. I also found the largest lazy susan swivel they had, 12", and set off to make the perch.


I cut it out, then sanded down to final dimensions. I also smoothed and beveled the edges. Then I attached the upright to the base with wood glue and six 4" grabber screws. I added a strip of oak edging to strengthen the joint with more glue and nails. Now I cut out the floor piece from 3/4" plywood, then determined where the center is and added the swivel.


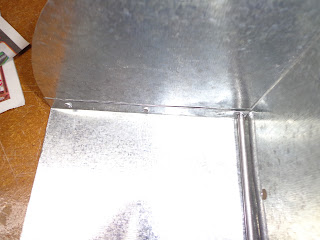
If you look closely you can see a large hole at the 4 o'clock and 10 o'clock positions. Those holes will be drilled out from the bottom. This then allows screws to be put in from the back side of the floor plate to the underside of the perch floor plate. You can see there are three hole sizes in each quarter of the circle. Pick which size you need, screw in one and then the opposing one through the access holes we made, rotate the floor plate 90 degrees and put the other two in. From the top there is visible connection.

Now I am coating the perch with several layers of boiled linseed oil. It should give a very hard and easy to clean surface while bringing out the color of the wood.


I also found out how to bend schedule 40 PVC pipe. I had tried to use a heat gun to put some bend in a pipe, but I couldn't get it to a uniform heat. Recently it dawned on me to try what I do with Kydex. I heated the oven to 350 degrees, and put a 18" piece of pipe on a baking sheet, with one end resting up on the edge. I do this to see when the plastic becomes malleable and bends in the heat. After only two minutes, the pipe became soft and flexible. I put a slight bend in it and then held it against the counter until it held the curve on it's own. I then ran some water through it to cool it the rest of the way. I also learned to keep the pipe away from any heating elements as it can burn and warp.


I'll be using this on top of the perch to give it a good dimension, and then wrap it with astroturf. I'll cut a grove down the middle, heat it up then mold it to the wood.

Here's a picture of my dad as we work on the new trap design.


Here's the final product


Good news

Thing's are starting to move along. I found that the big access side only had one zip tie keeping it shut and an edge had been bent up. I'm pretty sure that is how the bird escaped, the dog is teaching me a lot about my designs. I zip tied it down and no more escapes. Wednesday I caught two more birds, so I added them to the V trap bringing us to three guests. But first here is a picture of the rubber gasket and then the hook.


And now the next birds caught. Two fer.


 The V seems about right now with three, and outside starlings are crawling all over it, but even with lots of bait inside and some on the restricter plate outside, none have entered. My wife mentioned suggested when the newly fledged ones are out during the warmer weather we might have a lot more luck. My sponsor recommended adding a place for the starlings to hide when they're stressed. So my large CO2 chamber became a hiding spot.


Here are the components on the Mack truck, and there's the V trap's new home. The little opening contraption is called a blast gate. It's made of ABS and is normally part of a woodworker's dust vacuuming system.


 I painted it black, screwed a dowel going from side to side, and put in a rabbit wire floor to keep them out of their feces. Now it is mounted to the side of the trap supported by a shelf and a wire retainer.


Now when I want to clear out the birds I can slide the gate shut and still use it as a CO2 chamber. Here bit is mounted on the trap.


And now for the best part, this morning when we went to check the trap and there were FIVE starlings in there!


My daughter helped me transfer them into the smaller box and I gassed them. It was quick and smooth. We put them in baggies and went to get a couple English sparrows my dad caught in a funnel trap. Very productive day. Total: 3 caught but escaped, 3 in the V, and 10 in the freezer.

Here we are bagging the birds.

Tuesday, November 13, 2012

Ups and Downs

Here's the first bird in the Nest Box (NB.)


Looks like a mature bird. It was very highly strung, really working to get out. I moved it into the V trap.


Unfortunately the night was cold and when I checked in the morning, it was dead. But there was another one in the NB. So I put the first one in a bag for the freezer and moved the other one over. This one was calm but pecked at me every chance it got. Here it is in the "V."


I think this was a he because of it's calm yet aggressive nature. He also started to eat shortly after arrival. You may notice in the first picture I used zip ties to secure the catcher. I decided I would construct a hook made out of heavy wire. I put this on the support you can see behind the left side of the cage. Then I pushed the pipe through the rubber on the catcher lid then eased it back down on the hook. It was stable, with a tight fit, and should be easier to remove the cage.

Well, yesterday there wasn't anything in the V. And insult to injury, nothing in the NB either. There were dog tracks around the trap, so many in fact it was bare dirt and no snow. I don't if the bird was so worked up it found it's way back out the slots or ,very unlikely, the dog pushed the access hatch open.

Today though, another one in the NB. So I moved the trap up onto the Mack truck bed, about 4' feet off the ground. Hopefully this will cut down on the dog's ability to stress the birds, the bird will still be there in the morning, and I can get another bird from the NB and start a small flock. I think I need a couple birds in the trap to see if the V can bring birds and keep them on it's own. I also put a branch over a couple of the slots.
 
I'm hoping I don't need to monkey with the slots, but if I can't keep birds in I'll try to decrease the width of the slots. If that doesn't work, I've got some ideas for one way wires. Another idea might be to attach an mechanism like the NB to the side of the V with the cage replacing the down tube, and maybe a plexiglass flap and a couple little magnets to hold it shut as the one way valve.

My dad said he put the plexiglass plate in the 3" T on the back of the chicken coop and caught a sparrow. We'll see if that was a fluke. I'll get pictures of that trap.

I also started to build that rotating perch with my dad today. I'll show that and some of the paracord jesses ( pronounced jessies) and a leash. Plus a lure.

Saturday, November 10, 2012

Active trapping


First off, caught my first starling (which didn't escape) today! I transferred it to the V trap and hope to start luring his buddies in.

I will be posting pictures of the adjustments I made to the system, as well as my first bird pictures too. But there's no slot for my SD chip on this computer machine, so those will come later.

This is a picture of a trap made by Richard Van Vleck. I don't know how the internals work, but I have attempted to reverse engineer it, or at least how I would build it.

He describes it as having a dropping floor and a sweeping wall. By looking at the roof I imagine the wall pivots and keeps in close proximity to it. The floor drops when the bird lands in the bottom of the cavity, and the doo hickey hanging off the side appears to be the counter balance which would move up and down in that slot. When the floor drops down the bird drops into the pipe in the bottom, from that point it is similar to the Nest Box set up.

Here is what I would make the inside look like.


 I would make it out of light sheet metal. Here's a preliminary template. Though this model isn't to scale, I would make each square 5"x5" or 6"x6".


Then I would bend the sheet metal like the following. The hole will match the hole in front exactly so that as soon as the floor drops, the entrance hole will be closed off very quickly. I would rivet the side wall tab to the floor tab.


The side is the rounded one, the floor has the two flanges, and then the back.

I would drill a hole through the two flanges under the back wall for the hinge axle. I'm still cogitating about putting the counter balance along the side wall flange or center it in the floor.

Thursday, November 8, 2012

Starling Trap: V Trap

This is the trap I'm hoping to fill my freezer with. I had a good time making this: its dimensions are 4' high x 3' wide x 4' long. It has no moving parts, at least not involved with catching the birds.


I wanted it to be light and strong enough to withstand moving from one location to the next. I'm sure there are cheaper ways, but I want this to last years in all kinds of weather. This simple little set up with three boards and some holes is the heart of this trap. The slots are 1 3/4" wide and 5 or 6 inches long. The vertical boards keep the birds from crawling along the wire to the slots. The width of the slots is too narrow for a starling to fit back through with its wings out. Also they naturally want to fly up and away, which leads them up to the peaks on either side and away from the slots.


I used rabbit wire because I wanted to make sure that nothing can get to the starlings and to increase the trap's longevity. I'll see how long the zip ties will last, but I plan on using wire around the bottom once I see how things go. I'm always open to adjusting and love making things better.


I left one of the top sections hinged so that birds could get used to going in and out for a week and then zip it closed.


I actually got rid of the arrow shaft and just zipped it on loosely. I didn't like the gaps at the top. I got it all closed in.


Then I added an exit hole. My plan is to construct a cover out of weed barrier (left over from our landscaping this summer.) It's black and cuts out light, and I put it on when I've got a bunch of birds in the trap. I'll let them sit for a while, then open the sliding cover over the hole. I'm thinking I'll put a white pillow case or something similar for the birds to escape into. That'll go into a container with some CO2. It's all theory right now. Maybe make a down pipe like on the nesting box?


I put a perch and some cover in one of the high sides. I also added an access hole with a round opening to reduce the chance escape. I also found some little magnets shaped like washers so they hold the hatch down quite well.


Completed trap. Or a really big paper weight.