Thursday, May 30, 2013

Mews building

Here we go, the mews.


 Brett


End of the first day.

Second day progress


Hardiboard siding


Rafters and sheathing

 End of second day

Mews windows

With the pad coated in a garage floor epoxy, I moved to constructing my barred windows.

 First, I decided I needed enough space to have bars, then mosquito screen, then a frame on the inside of the frame to block all light. I also wanted the screen set away from the bars so that the bird won't catch it's talons. So I went with 2x6.

I decided to use 3/4" EMT conduit for the bars. I put the hole centers 1 inch from the edge and 1 1/2" from each other. I went with this spacing so it would work with a smaller bird, like a Merlin or Sharp shin, which are in the scrub jay or magpie size range.

 I tried a couple different approaches, but settled on drilling through the top board, then screwing top and bottom together and using the top as a guide. Using a 3/4" auger bit and a drill press, I set up a fence to keep the holes straight and drilled all the way through the top, but only half way through the bottom plate.

 I cut the uprights to give me an overall dimension of 2'x3'.

I taped the conduit into 7 piece bundles, and using a special metal blade, cut them 1'11". I used 14 8' conduit, 21 2' bars per window.
Here they are assembled. Next we painted them.

I now need to add the mosquito screen.

Sunday, May 19, 2013

Framing Bird House/ Pigeon Coop

My step-dad came over and helped me frame up the dividing walls between the bird area and the storage space.


Then I cut in the holes for the vents and the window. I can't decide whether to make the cut out piece into a door or a panel, to set in the holes during really cold weather ( 10's and 20's.) If I go with a panel I will still have to figure out a secure way to hold it in.

The West side will be for starlings and sparrows, the east side will be for culled pigeons from local pigeon breeders. I anticipate having up to 20 pigeons at a time max in a 4'x4'x7' enclosure. We'll see how many starlings and English sparrows we catch. This is a picture of the starling side.

Starling side exterior. I still need to cut out the pigeon side but waited because I ran out of 1/2" hardware cloth.

The next day my step-dad came back to help me get the floors and dividers framed. The floor will be rabbit wire elevated 18" above the floor, so that I can clean up and the birds will stay clean.

 Wall covered and door added.

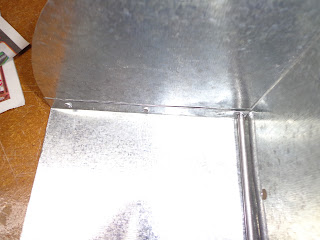
 This is the clever handle/ lock he came up with.

I'll need to add a little door to each side and a coat of paint to seal the wood, then it'll be time to wire it up.

Next day I added perches in both sides.

 Then we gave them a coating of primer. Next will be some nest boxes on the pigeon side, then access doors, and finally wire and floor coatings.

 
 Starling nesting cans. We'll see if they will use these like the nesting box. The idea is they go in the can to hide, I slide a piece of sheet metal keeping them in the can. Easier than using a net (I hope.)

 
Access door and flap, which uses small magnets to keep closed. Pine shavings to keep clean and smelling good.

Friday, May 17, 2013

Bird House and Mews begin

Since I will be building my mews on the existing concrete pad, I wanted to prep the concrete so that it won't absorb moisture. I power washed the concrete until it was very clean, then I gave it a couple coats of epoxy garage floor sealant.
I'm putting it on the north side of my house to keep it as cool as possible in the summer.

I also just had a shed built, and I figured it would cost less to have them add 4 feet versus building a separate structure. It's now 10'x14', and I'll use the last 4 feet for a coop for about 20 pigeons on one side and the other side for starlings and sparrows. I'm planning on several vents on each side and a 2'x3' windows in each enclosure that will have a hinged cover for colder weather.

I already sealed the floor with some left over epoxy sealant.

Here's what ten tons of gravel look like on a playground.

You can see the board marking off the last 4 feet of the shed. My dad is pointing it out. Don't worry, I finished by adding a couple more feet of gravel on this west side.

You can also see the doors, window frames, and bars for my mews.

Tilting floor trap and perch

Here's the axle, the rod in the corner.
Here's the sides and face plate. Also the tipping floor and funneling chute.
Counter-balance arm and slot in side wall. Notice the floor and wall arc matches the arc of the roof

.
The chute that will lead to the down tube and catch cage.
The tipping floor wall hole will close off as soon as it tips. There's the counter balance bolt, nut, and washer.
  Counter balance arm and what seems to be the right amount of weight, such that the floor tips with 4 qtrs.

Trapping slowed

Now that the starlings are breeding and food is abundant, trapping has completely stopped. Final tally was just shy of 100.

All the bags have 4 in them (this one only has two), but I sold 10 earlier in the winter. Most of these were caught in the Nest Box, 2 in my tilting floor design, and ZERO in the V trap as it was designed to function.

But I did make the V work for me. I added two one way gates along the floor near the food dispenser. During cold weeks, I would chum the entrance with cat food and prop it open, to try and establish a pattern of food. I would refill it each morning for a day or so, then leave. I would finally chum it at the same time of day and then wait in my car and watch. Usually one or two scouts would test the waters, then quickly many more would show up. I would wait until 5 or more were in the trap, then I would jump out with a lot of noise and arm waving. The starlings would all fly up and away from me and the entrances. I would then drop the one way doors and voila! , the V trap worked!

I would give them a couple of days to get used to hiding in the black box, then I would get them in the box and move them into the killing jar and gas them. Then put four in a vacuum bag, seal it, date it, and into the freezer.

My dad has an over abundance of English house sparrows coming to his feeders, so improving on my V trap work-around,  I designed a trap that uses a mouse trap to close the one way door. I then made a set up so I can use a cord to trigger it remotely.


I made it wedge shaped so that the birds will move to the larger end away from the entrance. We'll see how it works. Downside, someone has to be there to trigger it. Upside, catch only what you want.